HOW SHOULD I SIT AT THE PIANO? AND WHY?
THE FUNDAMENTALS
Almost every piano teacher will tell you to sit a certain way at the piano. And almost every piano teacher will recommend a position for your hands and fingers. But if you don’t know the reasons for doing it that way, you’re really only doing it on your teacher’s authority. And that’s not a bad thing if you have a great teacher. But it’s so much better if you’re able to understand all the details that go into sitting at the piano. It gives you the tools to help YOURSELF! So that’s what I’m going to do for you in this post.
YOUR BODY DICTATES HOW YOU SIT AT THE PIANO
But before we begin, I want to emphasize that I’m not PRESCRIBING a certain way for YOU PERSONALLY to sit. I would do that if I were your piano teacher and if I could see how long your arms are or how tall your torso is. I would need to see those things to give you personalized information about how you should sit at the piano. But I’m not your teacher and I can’t see you as you try out the ideas in this post. But I can describe how I sit at the piano and WHY.
I think my reasons apply pretty widely to people sitting at the piano, and they may well apply to you. If so, great! But I can’t guarantee that what I’m about to share with you will help you play better, and if it doesn’t, you should work in person with a teacher to find a way to sit at the piano that works well for you.
And as always, if you try anything I suggest and it winds up hurting or causing you physical stress, JUST STOP. Don’t keep trying it. Work with a teacher and make sure that someone is supervising your practice so that you stay safe.
THE WAY THE PIANO IS MADE DICTATES HOW YOU SIT AT THE PIANO
OK, now that that disclaimer is out of the way, let’s start talking about how I sit at the piano. And the first thing to do is actually look inside the piano and learn a little about how it works.
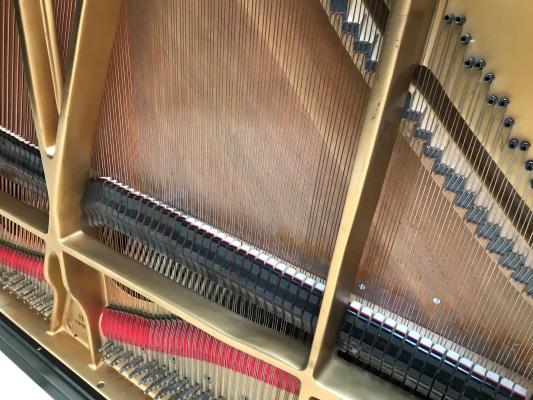
You can see that the piano is a stringed instrument. There are a ton of strings of different lengths and thicknesses inside the piano. Those strings vibrate to produce sounds. You can learn more about how vibration and sound in the first episode of Piano Unlocked.
The important thing to see here is that unlike a violin or cello, the piano does not use a bow to create friction against the strings. Instead, there’s a set of hammers underneath the strings that hit the strings from below to make them vibrate.
Each of these hammers is connected to one specific key on the piano. When I press that key, the hammer moves upward, toward the strings. When I press the key, another piece of felt, called a damper, also rises from above the strings. The damper rests between the strings and stops them from vibrating—except for on the highest notes, where the vibrations fade quickly without a damper. When I press the key, the hammer strikes the strings, the damper leaves the strings free to vibrate, and the combination of those things lets us hear a sound.
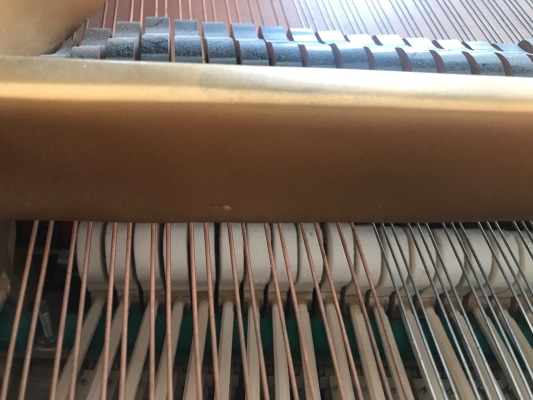
PIANO KEYS MOVE STRAIGHT UP AND DOWN
The hammers and the dampers move straight up and down. There’s no rocking motion. The hammer doesn’t strum or pluck the string from side to side. The hammer goes up along with the damper and strikes the string dead-on.
The keys also move purely up and down.
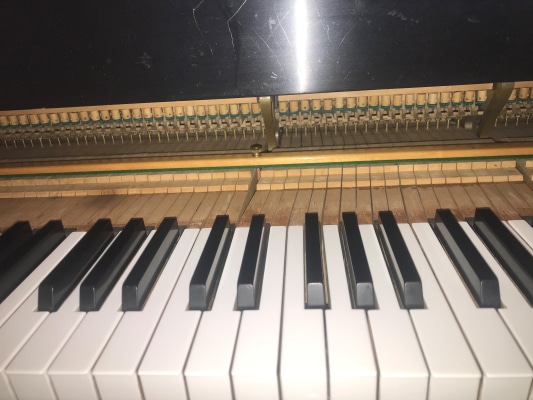
With the lid to the keyboard removed, you can see how the keys are connected to the hammers. The key extends deep into the action of the piano, like a lever or a seesaw. At the very back of the key, the hammer is attached, and that’s what moves straight up to strike the string and make the sound.
The sound happens when the key goes all the way down. Just touching the surface of the key (like they say, tickling the ivories) doesn’t do anything. And making gestures ABOVE the keys doesn’t do anything either. The sound happens when the hammer reaches the string. And to get the hammer to reach the string, the key has to go down.
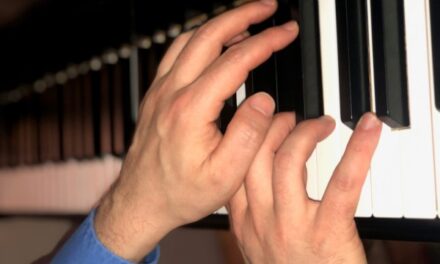
OUR FINGERS HAVE TO MOVE STRAIGHT DOWN, TOO!
OK, what does that have to do with sitting? Well, we need a way to sit that makes it easy for us to push the keys straight down. And what that means is we need a way to sit that makes it natural for our fingers to FACE DOWNWARD.
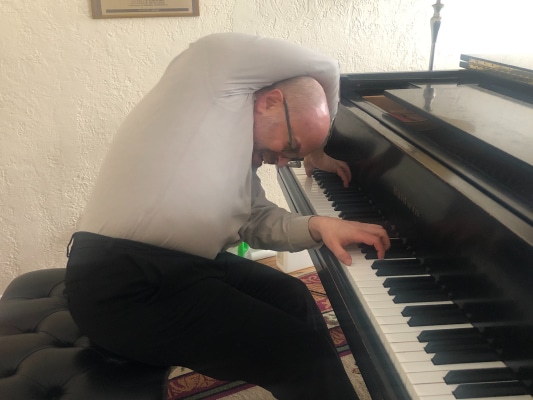
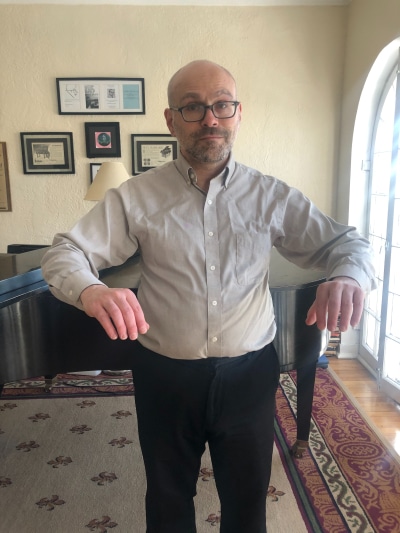
Whatever you do, don’t sit like this!
And NATURAL is the important word here. Because I can MAKE my fingers face downward no matter HOW I sit. Here my fingers are facing downward even though my elbow is behind my head. Now, you wouldn’t say THAT’s a great way to play the piano, right?
When I’m at the piano, I
- pull the bench pretty far back
- sit on the front half of the bench
- move my elbows away from my torso a little bit so that they’re rounded
- curve my fingers so that it’s really just the tip that comes into contact with the keys.
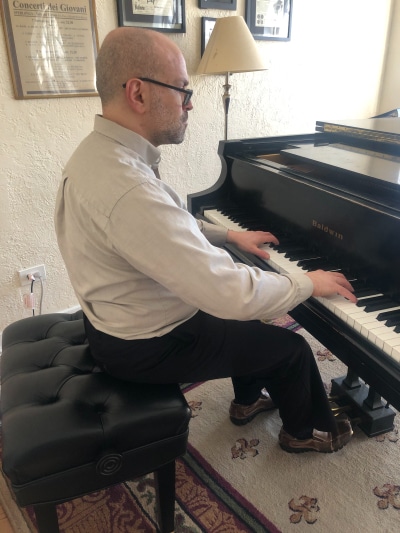
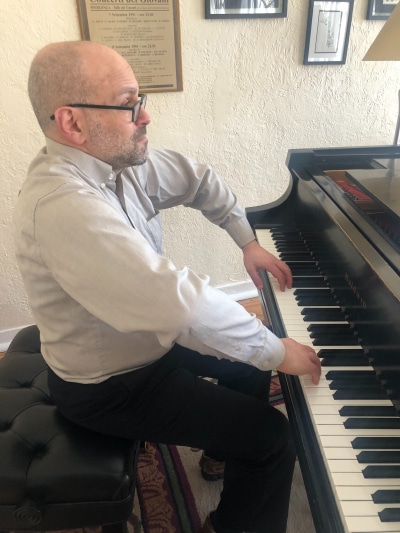
Sit like this instead!
That’s my standard position; there are other situations, like playing double thirds, or interlocking the hands, that require I make some alterations to that, but that is the default. So let’s talk about each of those aspects.
WHY USE CURVED FINGERS AT THE PIANO?
Why do I curve my fingers? If I keep my fingers flat against the keyboard, I have to make fairly large, weighty motions at the lowest knuckle to move my fingers up and down. That causes some stress for the muscles and tendons on the back of the hand.
When I curve my fingers, I can press the keys with really very miniscule motions. Quicker, more subtle motions that take virtually no effort. And that word SUBTLE is a good thing musically as well as physically.
With curved fingers, whatever energy I put into the piano is laser-focused into the fingertip, and I can change the angle or the firmness of the curve in millions of different adjustments.
With a flat finger, it’s like a light switch: either on or off. And I want more options than on or off when it comes to how I play a note on the piano.


CURVED ELBOWS IS A NATURAL PIANO POSITION
Why do I bend my elbows? Well, when my elbows are close to my sides, the natural position of my hands is vertical: facing in toward my sides. It looks like I’m ready to play the harp.
Sure, I can turn my wrists to make my hands face downward and it’s not painful or stressful, but it’s not the direction my hands naturally go in. They want to face inward.


 But see what happens when I move my elbows out? Perfect piano-playing angle! And playing piano is hard enough: why not use our body’s natural angle to help us rather than work against them?
Keeping my elbows out also frees my upper-arm muscles to work at the piano. If I have my elbows in at my sides, those muscles are cut off.
Elbows out doesn’t mean elbows UP. Don’t shrug your shoulders when you play piano!
But watch out! When my students first start trying to play with rounded elbows, they often confuse elbows OUT with elbows UP and raise their shoulders. That’s incredibly tense, and you can put your elbows out without shrugging: you just have to make sure your shoulders stay relaxed.
LEANING TOWARD HIGH AND LOW NOTES
Let’s say you’re playing something all the way at the top or the bottom of the keyboard. If I reach for those notes in my usual position, one of my arms gets stretched all the way out and the other arm struggles to get across my torso. And like I said before, that cuts off my access to the upper-arm muscles.
But what if I just lean my weight onto one hip [picture]. Now my torso is right between my arms once again, my elbows are free, and I can play these high notes just as easily as something in the middle of the keyboard.


SITTING FORWARD ON THE PIANO BENCH IS FREEING
Finally, why do I sit on the edge of the bench? I find that it gives me more access to all the musculature of my body. Not that I USE the back of my thighs to play the piano of course. But if the bulk of my is ON the bench, I feel the bench is soaking up some of my strength. And really, the bench is only there to stop me from falling on the floor while I play. When I’m on the edge of the bench, I’m poised, ready to put my all into the keys.
BUT REMEMBER: EVERY BODY IS DIFFERENT!
Now, I want to emphasize again: the positions I’m discussing work really well for ME. And I believe they make some good sense, based on how the piano is constructed and how the human body is shaped. But they’re not necessarily for everyone.
I’ve had students with back problems who absolutely cannot sit on the edge of a piano bench; they need more support. And even if you find that the basic ideas I’ve shared here work well for you, you’re not going to want to try to make your body look EXACTLY like mine when you play. It’s YOUR body, and what you do at the piano has to work for YOUR body, not mine.
If you have a piano teacher who sees you in person or online, they can help you refine your position to suit your body.
Most important, none of the positions I’ve demonstrated are meant to be RIGID. If you try to HOLD your body in one position while you play, that’s going to be very tense. There has to be room for subtle variation.
HOW TO SIT AT THE PIANO: THE MOST IMPORTANT KEY
The main idea is to use your body in a way that is most efficient, requires the least effort, and works IN TANDEM with the way the piano is made to provide the greatest effect. Like I said earlier, I make some changes when I’m playing thirds or interlocking my hands. Because I’m always using the position of my body to help me play the music. It’s the music, and the ease of playing, that comes first.
I hope that what I’ve shown you in this video will help make your piano playing more comfortable and easier. Check out my other videos about piano techniques for more great tips!
I’ve also made a video with all this information and some demonstrations. It’s right below, and you can also watch it on YouTube. Meanwhile, if you have any questions, please comment below this post.
And if it would be helpful for me to work closely with you as you practice the piano, please send me an e-mail through the contact form in the top menu to set up individual lessons.
If this post has been helpful for you, please share it! And please subscribe to my e-mail list below so you can know as soon as I put up my next post. Until next time, happy practicing!
